Are you looking for something to entertain the kids in your classroom? Origami is simple and relatively easy — at least this origami transforming star how-to is simple enough for kids! — and it helps teach children spatial and perception skills. Not bad for something you can do with a pile of Post-It notes you have in your classroom, right?
The teachers on the Teach Starter team love origami for the classroom because this mindfulness activity can help your students improve concentration and dexterity as well as hand-eye coordination, and there are even maths benefits that can result from this sort of classroom activity (Check out these cool origami rings that can help your students with fractions!).
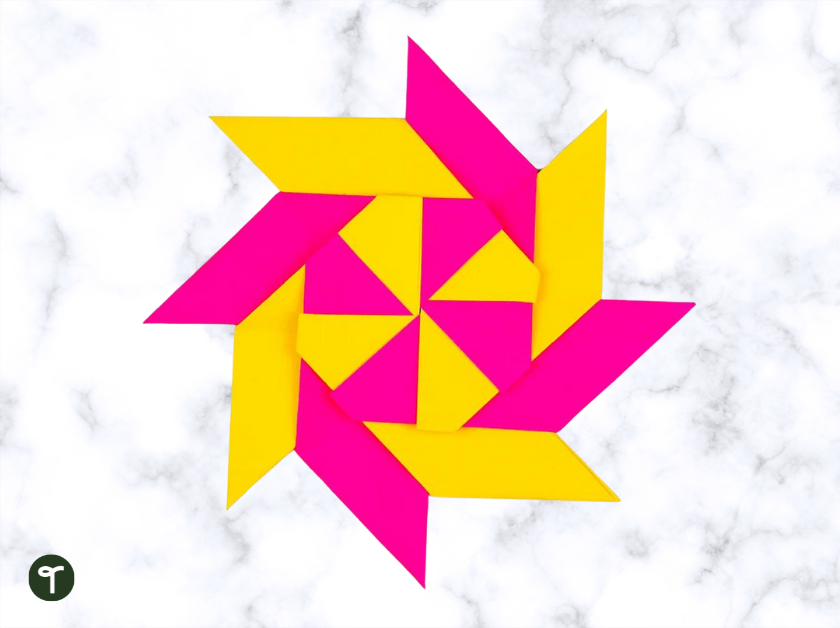
Believe it or not, all you need to make this origami transforming ninja star is 8 sticky notes and a little bit of time on your hands! Our team took care of the rest — right down to step-by-step instructions.
A video demonstration of how to make this origami ninja star is also available to all of our Teach Starter members with a premium subscription.
What Is a Ninja Star?
Before we dig into the paper-folding instructions for your students, it’s worth a quick look at what a ninja star even is! Also known as a shuriken, a ninja star is a traditional Japanese throwing weapon that was used by ninjas. It is a flat, bladed object, typically made of metal with a number of pointed edges.
There are several types of shuriken, including:
- Bo-shuriken (a straight, spike-shaped blade)
- Hira-shuriken (a flat, circular blade with several points)
- Shaken (a star-shaped blade with several points) — the type you’ll be making here
Of course, this particular star is made of paper only, but you still might want to set clear expectations about how your students can and cannot use them. It’s probably worth sharing that ninja stars were typically used as a distraction or to disable an opponent, rather than as a lethal weapon. They could be thrown from a distance to distract an enemy or to strike them on a non-vital part of the body, such as the arm or leg. You hear that, kids?
How to Make an Origami Ninja Star
So, what are you waiting for? Grab some sticky notes — it helps to grab at least four Post-It Notes of two different colours for a truly eye-catching ninja star — and have some fun with your class and the art of paper folding.
Use the step-by-step instructions with matching photos below, and check out printable origami instructions for easy animals, a dog, bird and more!
Step-by-Step Instructions — Transforming Ninja Star Origami
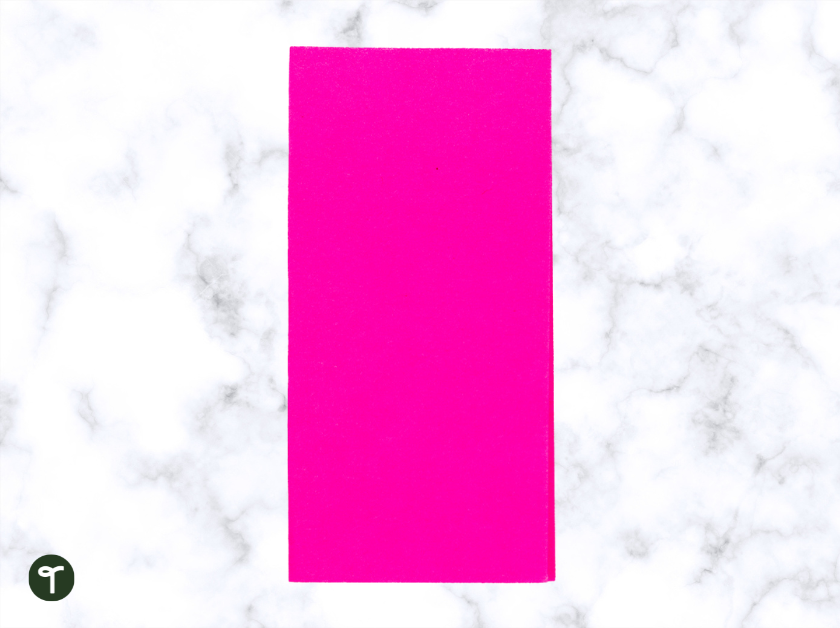
Step 1
Fold one sticky note in half with the sticky parts on the inside. So far this whole thing is pretty easy, right? It’s just a basic rectangle — something you can call out to your students if you’re working on shapes.
Step 2
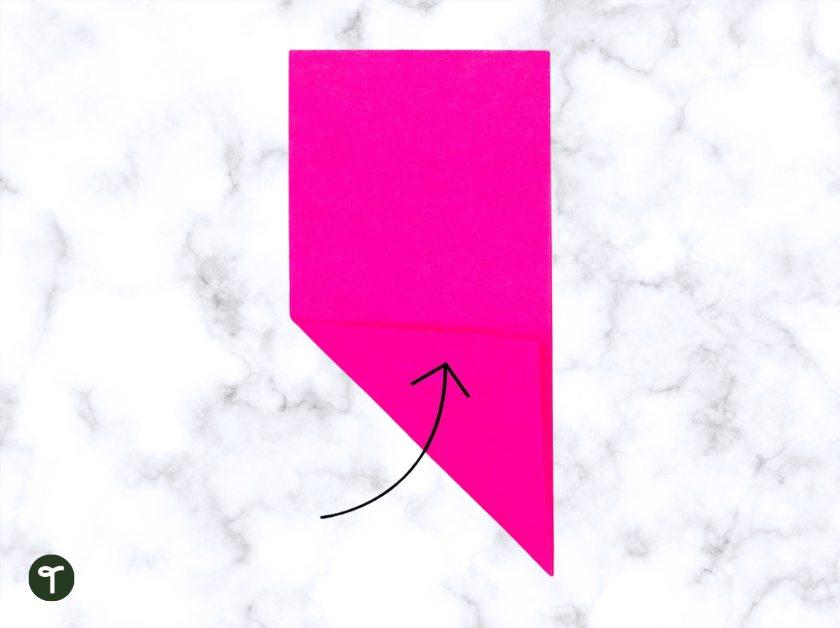
Next, you’re going to want to fold the bottom left corner up at a right angle. This will create a triangle shape (again, if you’re working on shapes, origami is a great way to get your students engaged!).
Teach Starter Teacher Tip: We opened it up and then folded it back the other way to make sure the crease was solid.
Step 3
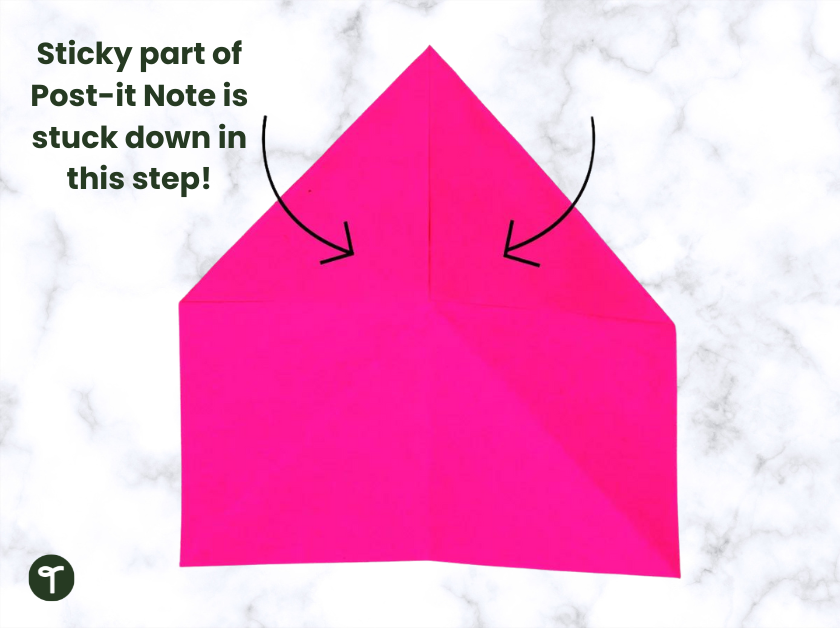
Unfold the sticky note all the way and fold the two top corners down to the middle crease, like the image below. Make sure you are folding the sticky part of the sticky note down in this step!
Step 4
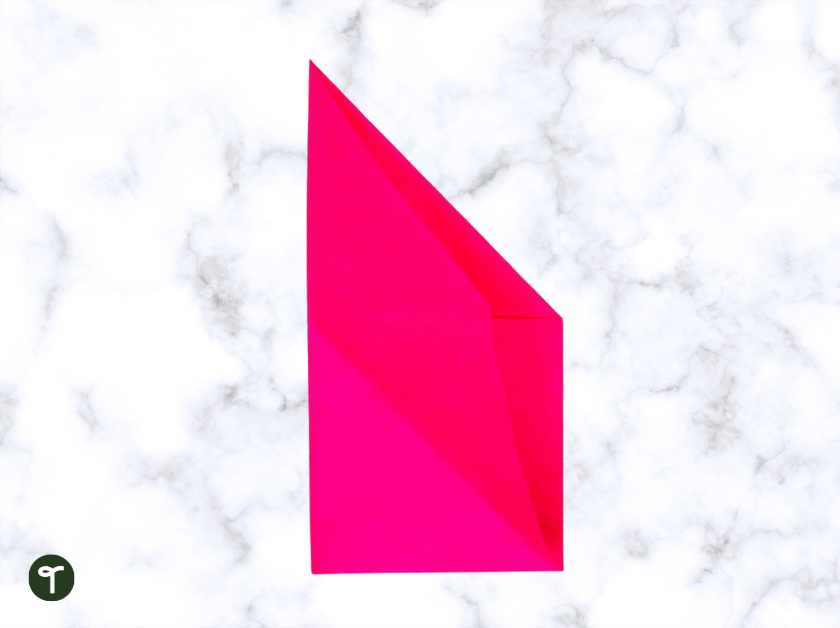
Fold the piece of Post-It Note paper in half again.
Step 5
Using the creases you made in step 2, fold the bottom toward the middle to create a parallelogram. This is a little tricky, but the photos should help …
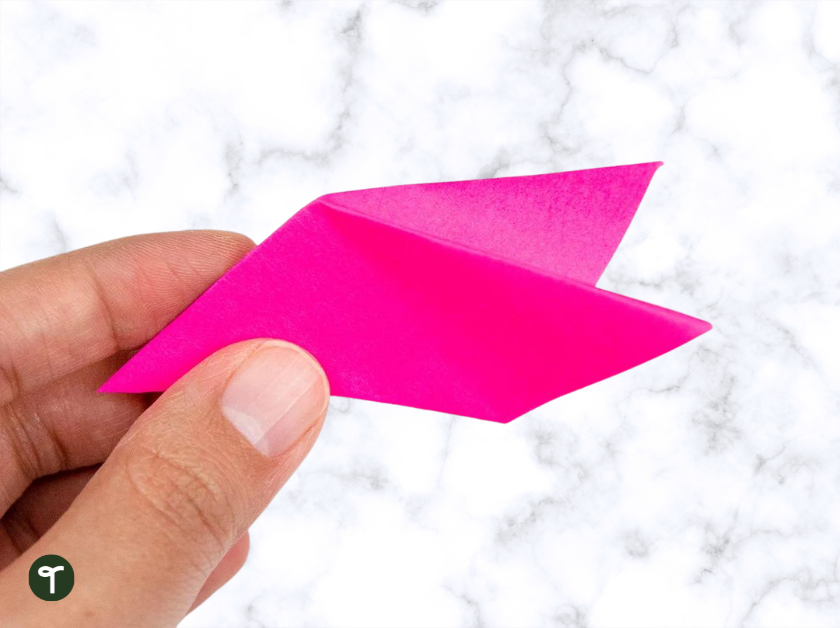
The picture below shows you what it should look like from another angle.
If you are struggling with this part, check out the video at the start of the blog to give you some more visual instructions.
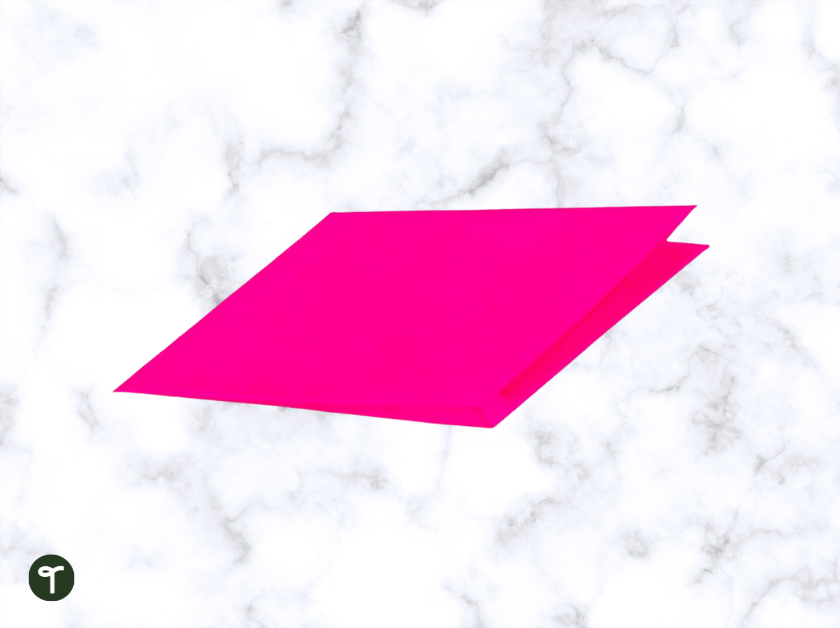
Step 6
Repeat steps 1-5 using the other sticky notes. In the end, you should have four of each colour!
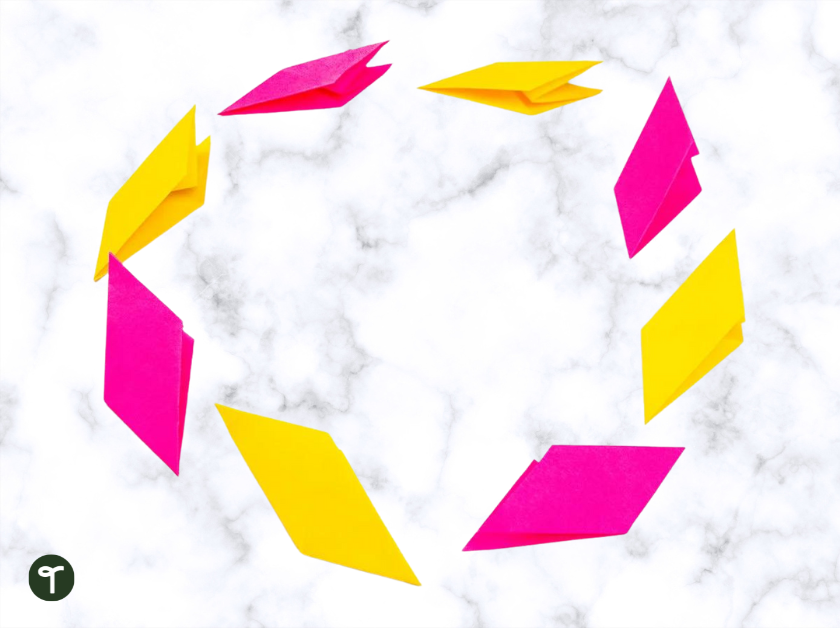
Step 7
Now the fun part! You need to put your sticky note creation together.
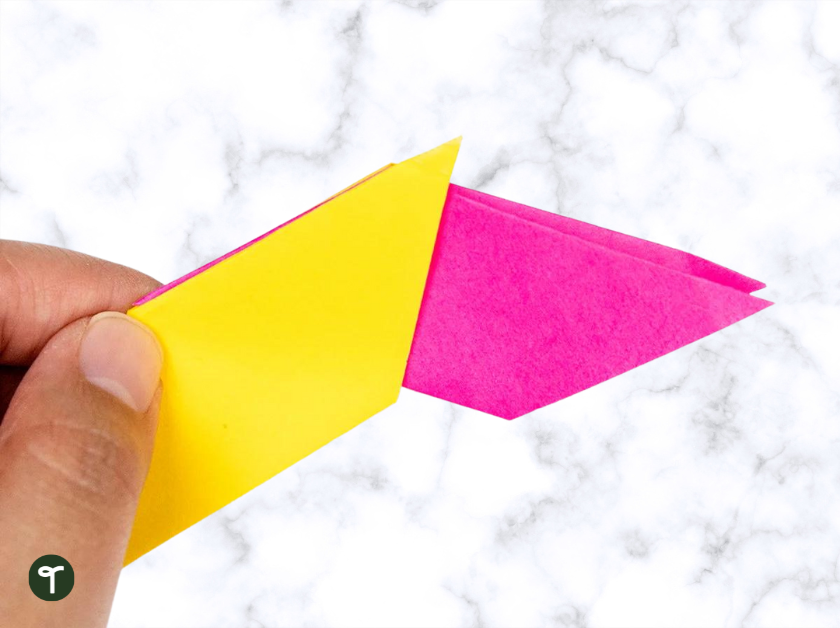
Pick up one piece of folded paper, and hold the opened part out to the right. Now, place another one inside the open part as shown below.
Teach Starter Teacher Tip: Make sure the second piece is all the way inside the first piece.
Step 8
Fold the little excess ends into the second piece as shown below.
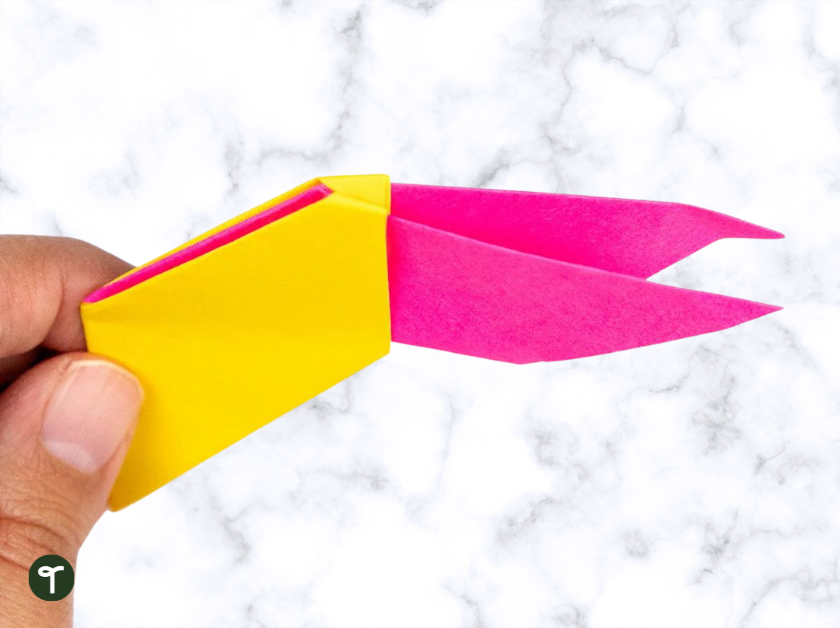
Step 9
Repeat the process, alternating colors, until you get to the last piece!
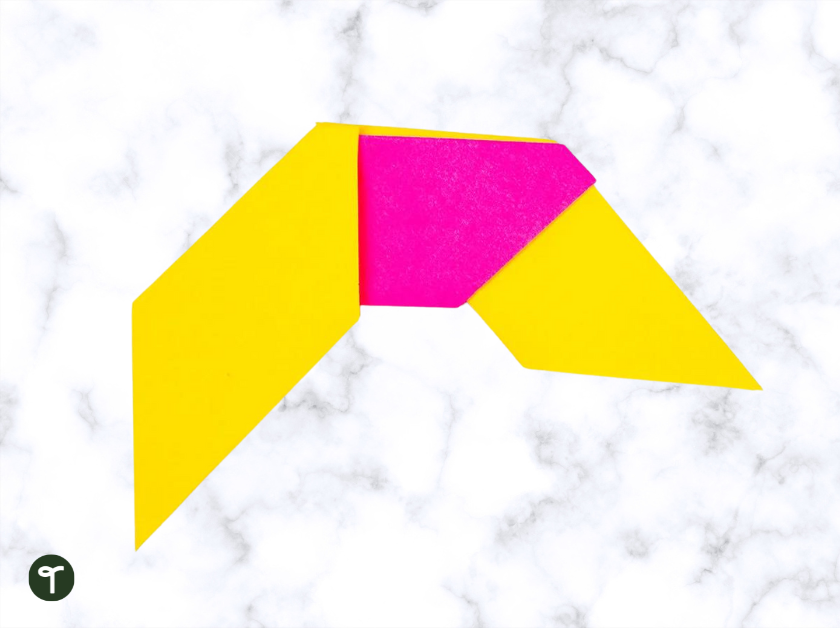
Step 10
The last piece goes in the same way, except you need to make sure the end opening part of the last piece is sitting on either side of the first piece you started with! Make sure all the little excess bits have been tucked in!
It’s just like a little jigsaw puzzle!
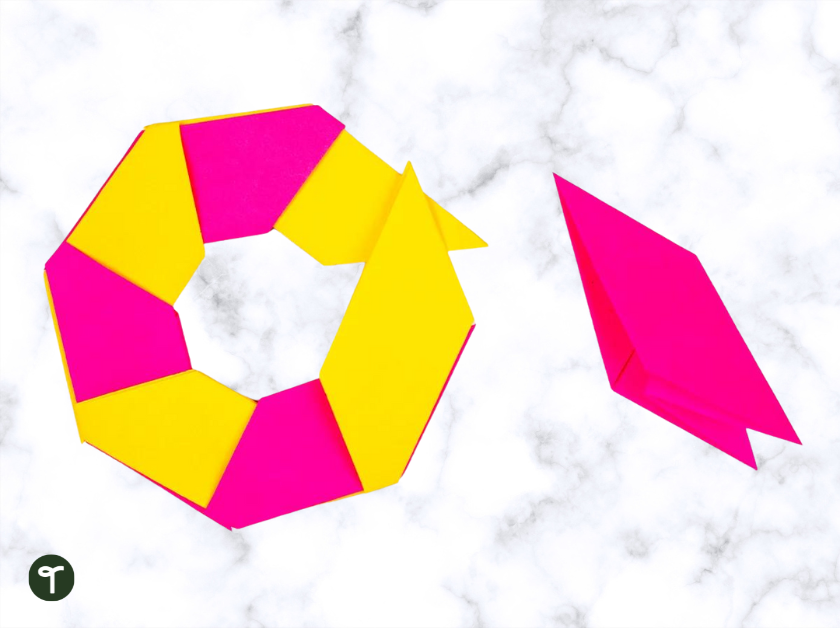
You are almost done! Now for the fun part!
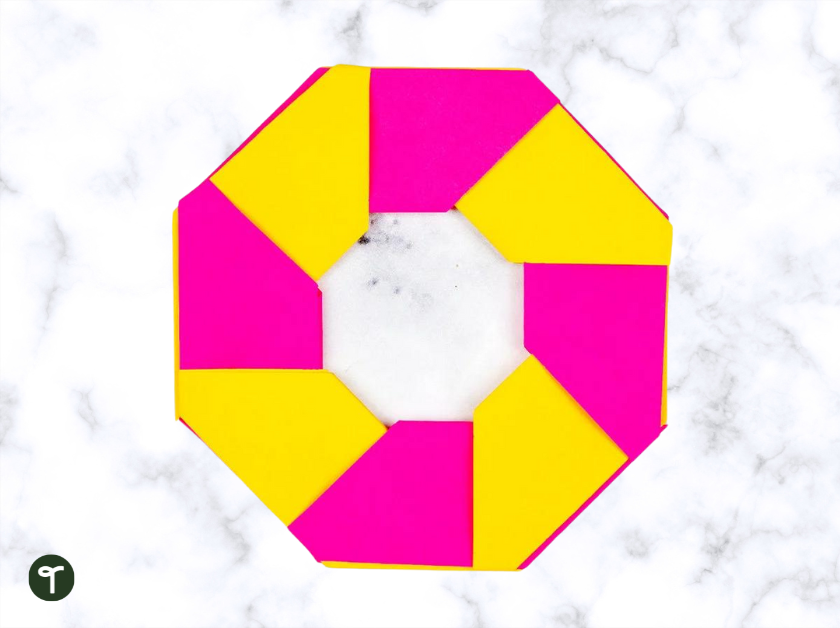
Hold the octagon shape on each side and push inwards until the little star points are sticking out!
Keep going until it is transformed into a star!




Just one thing: can you make the pictures into short gifs so we can see how to make it without any mistakes cause that would be great
Hi there Taiba. Thanks for your feedback! Please feel free to request a resource at our 'Request a Resource' page. https://www.teachstarter.com/request-a-resource/ Requests are voted on by the Teach Starter community and we create the top requests. Please let me know if you have any further questions, I’m more than happy to help.
OMG been looking for this kinda stuff for ages xD finally found it thank you you saved me from falling into despair lol
Hi Taiba, Thank you for your kind words! We're glad to hear you like the resource!