So it’s the Christmas season, and you’ve got a stash of paper plates in your classroom. Maybe they’re leftovers from a party. Maybe you picked them up when other teachers were giving away extras. Either way, you have the makings of some fabulous paper plate craft ideas for the end of term! There’s something so satisfying about using a frugal craft material and making it into something fantastic.
Perhaps one reason why we love using paper plates for holiday crafts is that the plate does a lot of the hard work for you. Their curved edges and circular dimensions make those tricky cutting jobs so much easier. Also, their surface is easy to draw and paint on and stick things to. What is there not to love?
The teachers on the Teach Starter team love just one thing more than a fun Christmas craft at the end of term — finding a way to re-use extra supplies and items! Read on for some of our favourite ways to turn the humble paper plate into a Christmas craft your class will love!
Paper Plate Holiday Crafts for Kids
We’ve tried. We’ve tested. Our Teach Starter teacher team put together some paper plate crafts for the holidays that we think you and your students will love. Don’t worry. We have been in the classroom just like you, so we’ve also considered how much time you have and how doable the activity ideas are.
Here are our top holiday craft picks to make with the humble paper plate.
Create a Classroom Christmas Tree
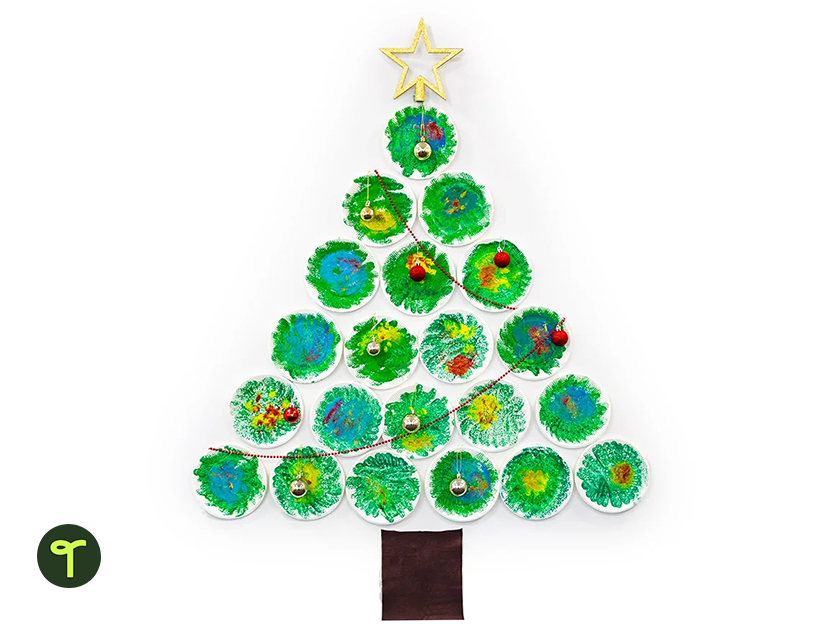
This holiday craft idea for kids checks off many of the boxes because it can be as simple or complicated as you choose. It relies on class teamwork, creates a great classroom display, and saves trees!
Supplies:
- Paper plates (at least one for each student, 28 plates work well)
- Green, blue, red and yellow poster paint
- Eco-friendly glitter or sparkly sequins
- Mounting putty
- Ornaments and other holiday decorations
- A star for the top
How to Make Your Paper Plate Christmas Tree
The instructions for creating your tree are fairly simple — Hand out paper plates and craft supplies, and let kids get crafty!
As a teacher, you then arrange them on the wall in a tree shape, and you’re done! Voila … holiday tree AND holiday classroom decor in one!
Even easier? Print a Christmas tree template, and let your students practise patterns, engage in mindful colouring, follow directions and show off their creativity!
Make Paper Plate Wreaths
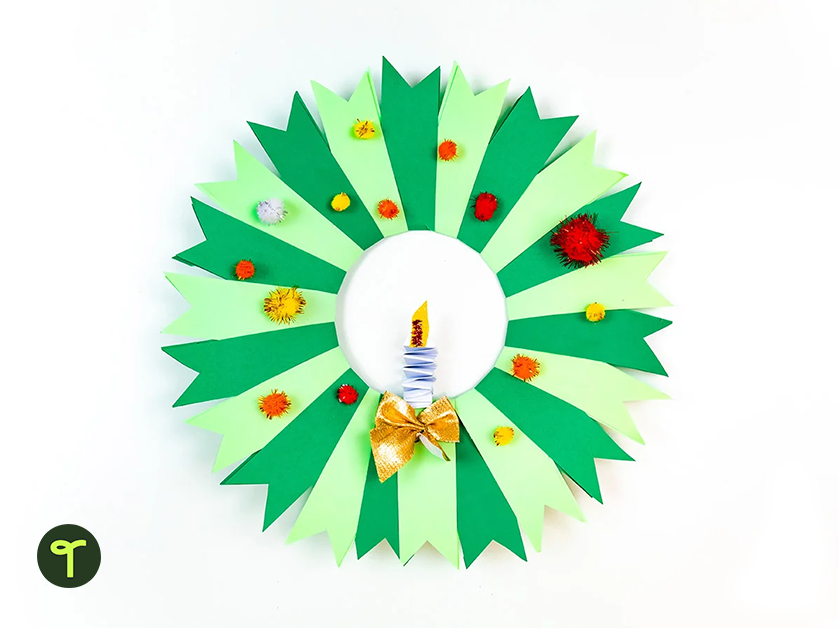
Once your students have got the hang of the folding and sticking process, this holiday craft idea provides a relaxing activity for them. It takes a little bit of prep work from an adult, but it’s well worth it.
How to Make Your Paper Plate Wreath
- Pre-cut the inner circle of the paper plate using a craft knife.
- Pre-cut the strips for your students using a paper cutter.
- Model for your students how to fold the paper strips back onto themselves and secure the tips with glue.
- Model for your students how to cut out the triangle tips. Make sure the glue is dry before you cut.
This paper plate wreath is a perfect gift for your students to take home or give to someone special this holiday season.
Stitch Reindeer Paper Plate Pouches
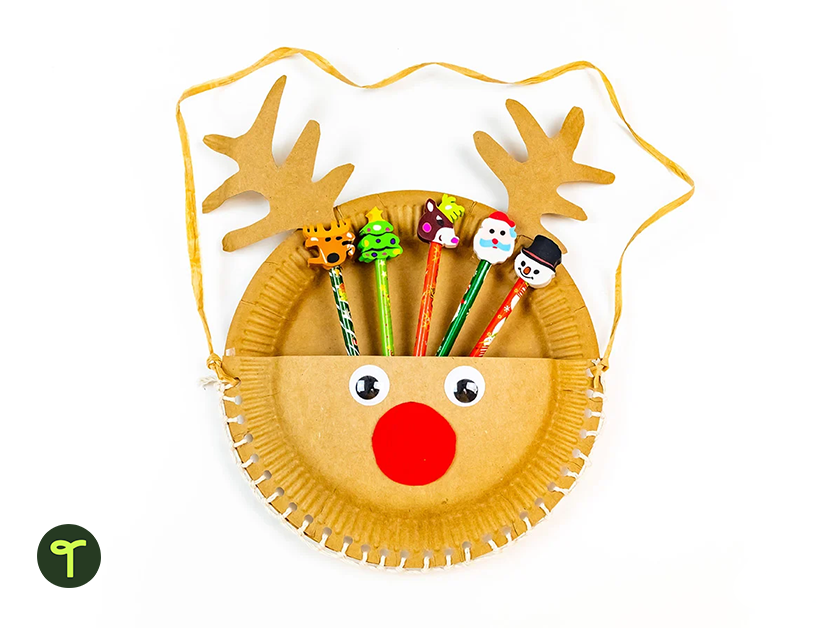
Whether your students are looking for a new accessory or a hanging storage solution, paper plate pouches are a craft idea with purpose. This Christmas craft activity is an excellent way for your students to develop their fine motor skills and learn the blanket stitch.
The only tricky part of this craft idea is the hole punching. It’s a job for an adult helper.

Turn a Paper Plate Into a Reindeer
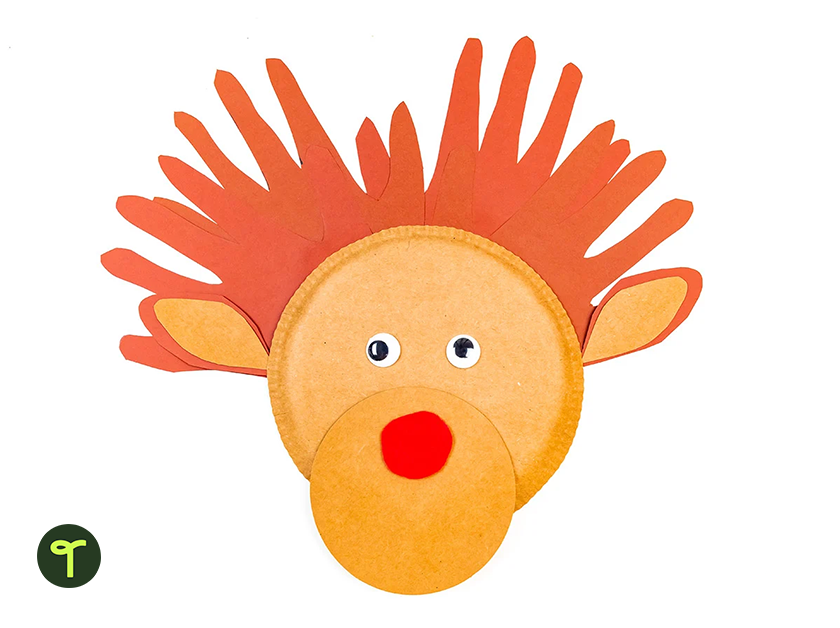
Rudolph the Red-Nosed Reindeer’s antlers are made from tracings of your student’s hands with this Christmas paper plate craft. One plate makes the main part of his face, and another forms his nose. Of course, you need something red for the main attraction — we used a pompom!
You can have students work in pairs or small groups to help each other trace their hands for antlers.
You will need:
- 2 x brown paper plates (white ones work too, just have your students colour them brown!)
- Brown paper
- Googly eyes
- Red felt or a red pompom
- Double-sided tape
- Scissors
Lace Plate Christmas Trees
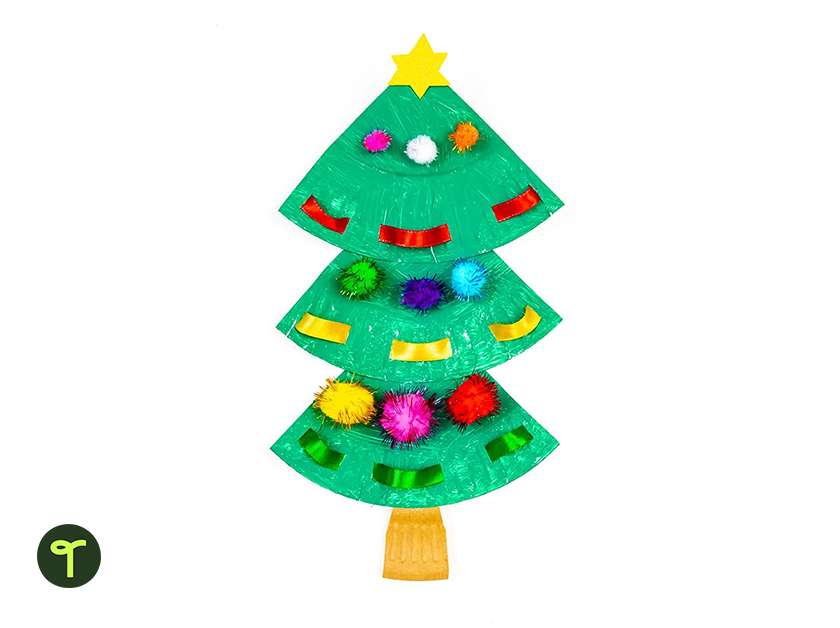
These lace plate Christmas trees help develop fine motor skills and mathematical thinking, too! Check out how this circle can be cut into thirds (or near enough) to create something fabulous!
How to Make Your Laced Trees
- Paint the plates green, allow them to dry, and cut them into thirds.
- Make six slits along the rim of each third.
- Lace ribbon through the slits and secure at each end with a simple knot.
- Stack and stick the triangles together using double-sided sticky tape.
- Add a brown trunk made from cardstock or a small piece of a paper plate and a few other decorations
Have fun turning the ultimate economical craft material into something fabulous!







Comments