Sort biotic vs. abiotic things and discuss their characteristics with a hands-on living vs. nonliving picture sort.
Breathe Life into Your Lessons With Living & Non-living Things Picture Cards
It’s ALIVE!
Or maybe it’s not. 🤔
Take your biological sciences lesson off the screen by encouraging your students to think about the characteristics of living things in their environment.
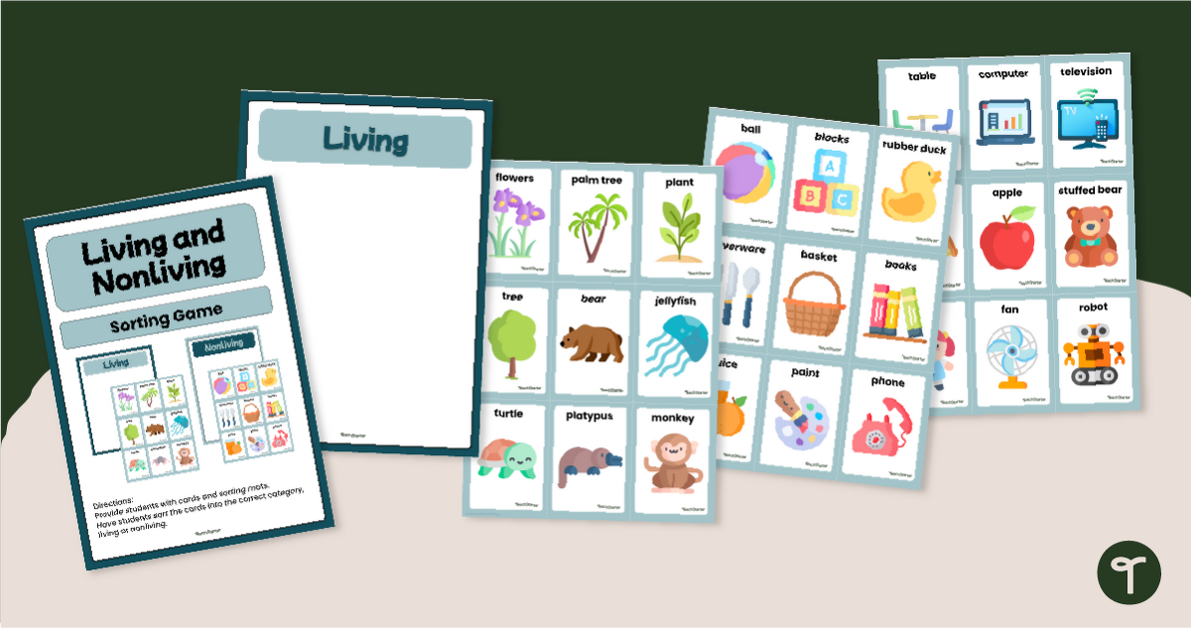
To play our sorting game, students will place image tiles onto posters that designate them as living animals or non-living objects.
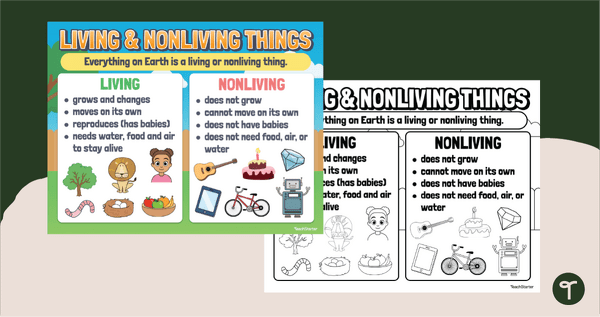
Through this activity, students will show they can classify living and non-living things based on whether they have basic needs and produce offspring.
Ways to Use Your Living & Nonliving Things Images
Take this activity further by asking the student to pull the living things tiles off the poster and sort them by animals, insects, and plants.
Use this activity in a small group setting for students who need support grouping tiles as living or non-living things. Encourage students to take turns identifying the images on the tiles and talking about their distinctive qualities. Does it breathe and eat? Does it grow? Does it have babies?
Additionally, turn this into a literacy game by sorting tiles that start with the same letter of the alphabet and then put the tiles in alphabetical order.
More Ways to Use This Animal Classifying Activity
A team of dedicated, experienced educators created this resource as an interactive practise activity. Use it in guided group and full-class science lessons in the following ways:
➕ Same But Different
Challenge students to access their critical thinking skills. As a whole class or in small groups, look at one completed poster at a time and ask students to compare the tiles to each other, listing out specific differences and similarities. For example:
- How is a bee different from a snake?
- How is a computer similar to a camera?
- Where does each living thing inhabit? What do they eat?
- Which objects do you use every day?
- Which things are bigger than you? Smaller than you?
🏃Animal Classification Relay Race
Split the class into two teams and have them line up in their groups on one side of the room. Lay the Living/Non-living Things cards in a central location between teams, shuffle the tiles, and split them into two sets placed face-down on the floor at the front of each line. When you say, “Go,” the first player in each line will grab the top tile, run to the other side of the room, and place the tile face-up beneath its appropriate poster. Then, they’ll run back to their group and tag the next person in line. That player will grab the top tile, run to the other side of the room, and place their tile where it belongs. Play will continue until each group has played all of their tiles. The team that has their tiles played in the correct order first wins.
🎭 Charades
Ditch the sort and use the tiles as charade prompts. Divide your class or small group into two teams. Teams will take turns sending up one student to act out the tiles for their team while you keep score. If their team guesses the word and identifies it as a living or non-living thing, they get one point.
Easily Prepare This Resource for Your Students
Use the dropdown icon on the Download button to choose which version works best for you and your students. They include:
- Editable Google Slides File
- Non-Editable PDF Printable
Print on thick card for added durability and longevity. Place all pieces in a folder or large envelope for easy access.
Why stop there? Add these engaging activities and teaching resources to your organisms lessons:
[resource:61280] [resource:1932082] [resource:12875]

Thank you. Saves lots of time. I will use this sorting activity at the end of the lesson on the observable and non-observable features of living things.
Hey Cilla, thank you for you nice feedback. I hope you gain a lot from your students by using these.