No doubt, at this time of year, you’re busily scrambling to tie up loose ends at the end of the term. You are likely making great efforts to keep your students engaged and field the dozens of “How much longer until the holidays?” questions you get (from students and your colleagues!). Getting your students to come up with unique and creative Christmas card ideas to make and send home to their families seems like it would be the last thing on your mind.
So, don’t stress – we’ve done it for you!
If Christmas craft elicits a groan of despair from you, then don’t panic – these crafty Christmas cards are easily made, with minimal equipment and very little fuss.
Take a look for yourself!
5 Crafty Christmas Card Ideas
Do You Want to Build a Snowman?
Use our Pop-Up Snowman template to create a snowman surprise inside your card!
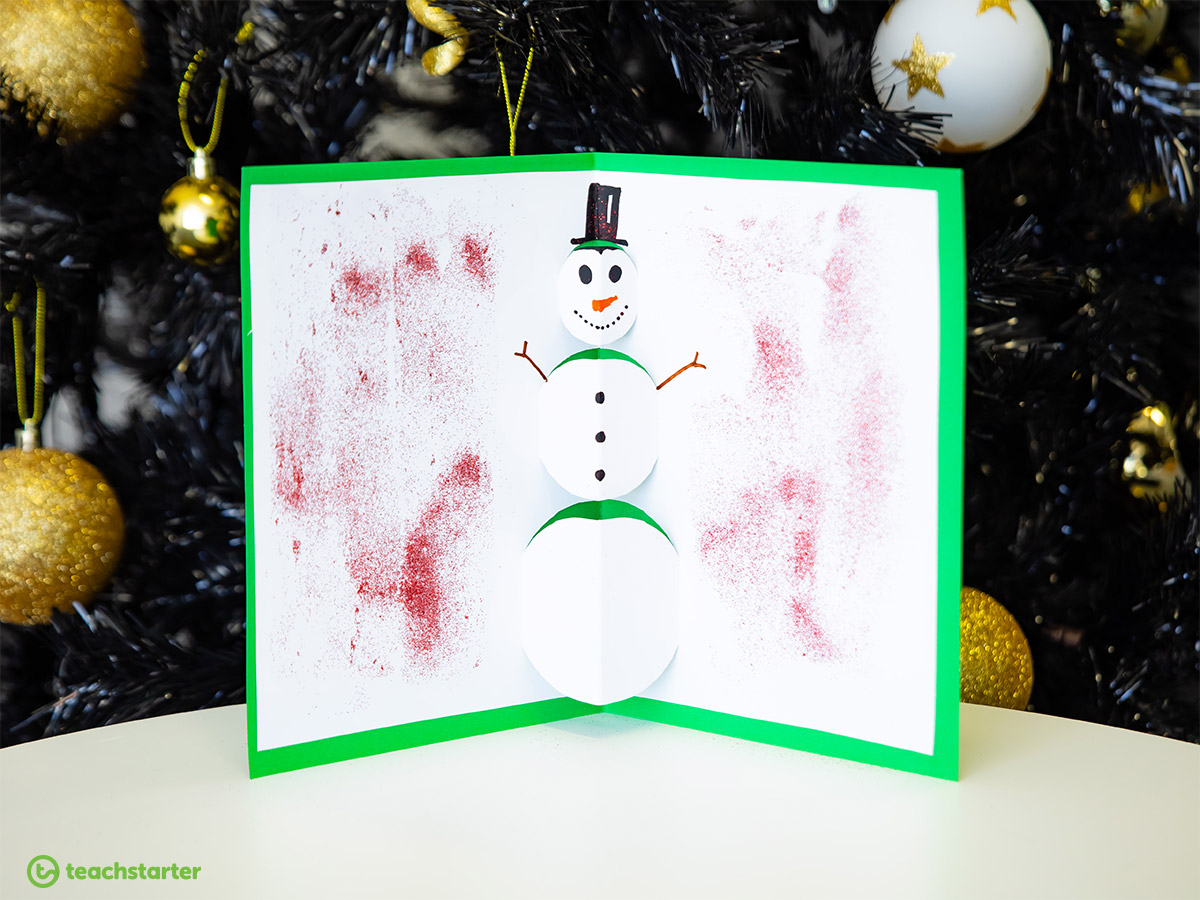
Materials:
- Pop-Up Snowman template
- scissors
- glue
- backing card
- colouring pens/pencils
To make your card:
- Cut around the borderline.
- Fold the paper in half so the short edges are lined up.
- Reverse the fold of the paper so that the cut lines are on the outside.
- Cut along the dotted lines.
- Push the circular sections inside out so that they are folded within the card.
- Glue the back of the card to a piece of backing card.
Decorate your snowman and create a scene behind him, or use glitter for a more simple (yet sparkly) design.
Bauble Fun
This beautiful card craft will be a hit! Make one large bauble or several small ones – whatever you do, make them colourful!
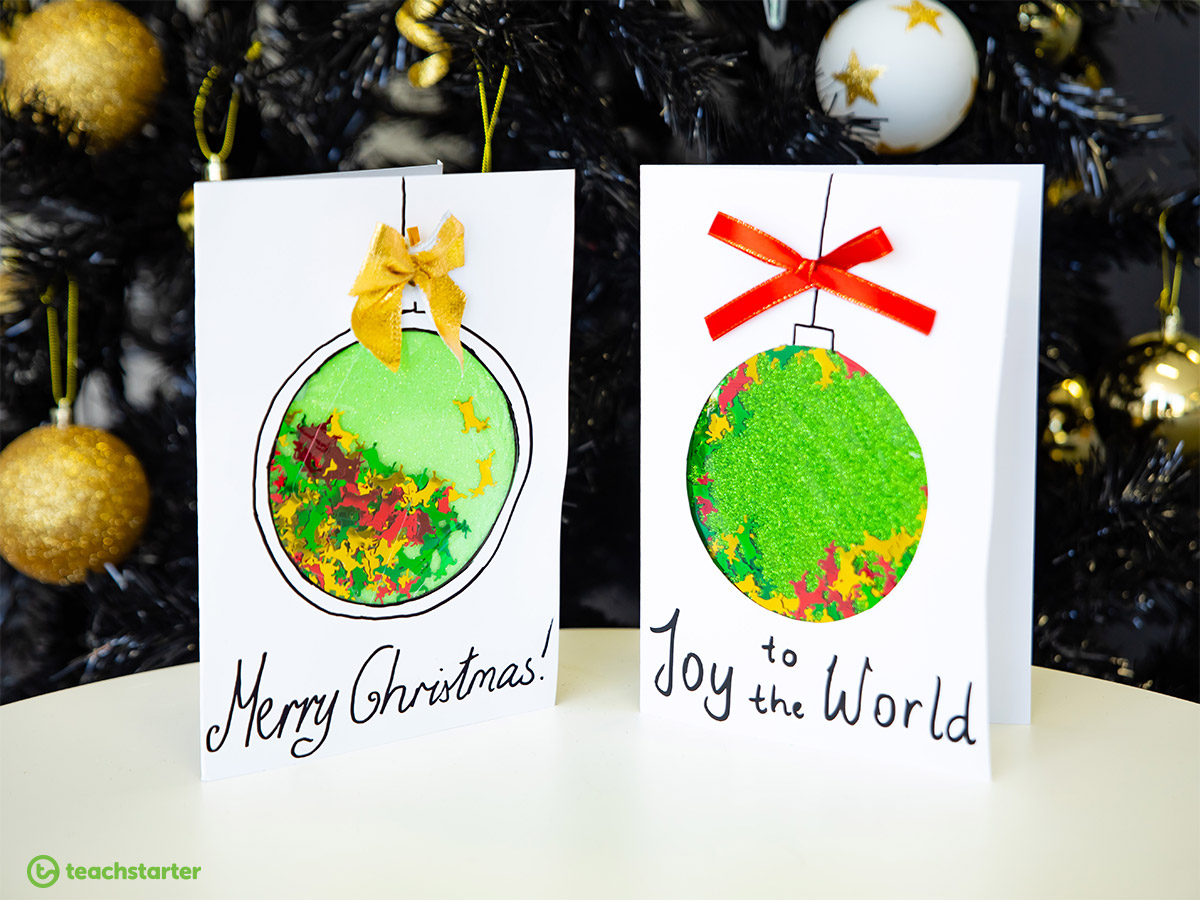
Materials:
- 2 x sheets of white A4 card
- glittery paper/Christmas wrapping paper
- clear cellophane/transparent card
- scissors
- adhesive (either tape, PVA or hot glue)
- Christmas themed sequins/glitter
- permanent marker
- something to trace two circles (one large, one slightly smaller)
- small ribbon to make a bow
To make your card:
- Trace a small circle in the centre of the front of your card. Carefully cut out the circle.
- Cut a slightly larger circle from your cellophane and your glittery paper/Christmas wrapping paper.
- Carefully glue the transparent circle to the inside of your card, creating a ‘window’ out of the smaller circle.
- Place your Christmas themed sequins/glitter carefully on the inside of the window.
- Glue the circle of glittery paper/Christmas wrapping paper face down over the window, sealing the sequins and glitter inside.
- Glue your second piece of A4 card inside the outer card to ‘hide’ the back of the window.
- Finally, decorate the front of your card to make it look like a Christmas bauble – think ribbon, a cheery greeting, the options are endless!
You can also use this idea to create a cheerful Christmas snowglobe!
Pop-Up Surprise – Repurposing Old Christmas Cards
Old Christmas cards can be brought back to life with this creative craft! This is a fantastic craft that supports the values of re-using and recycling.
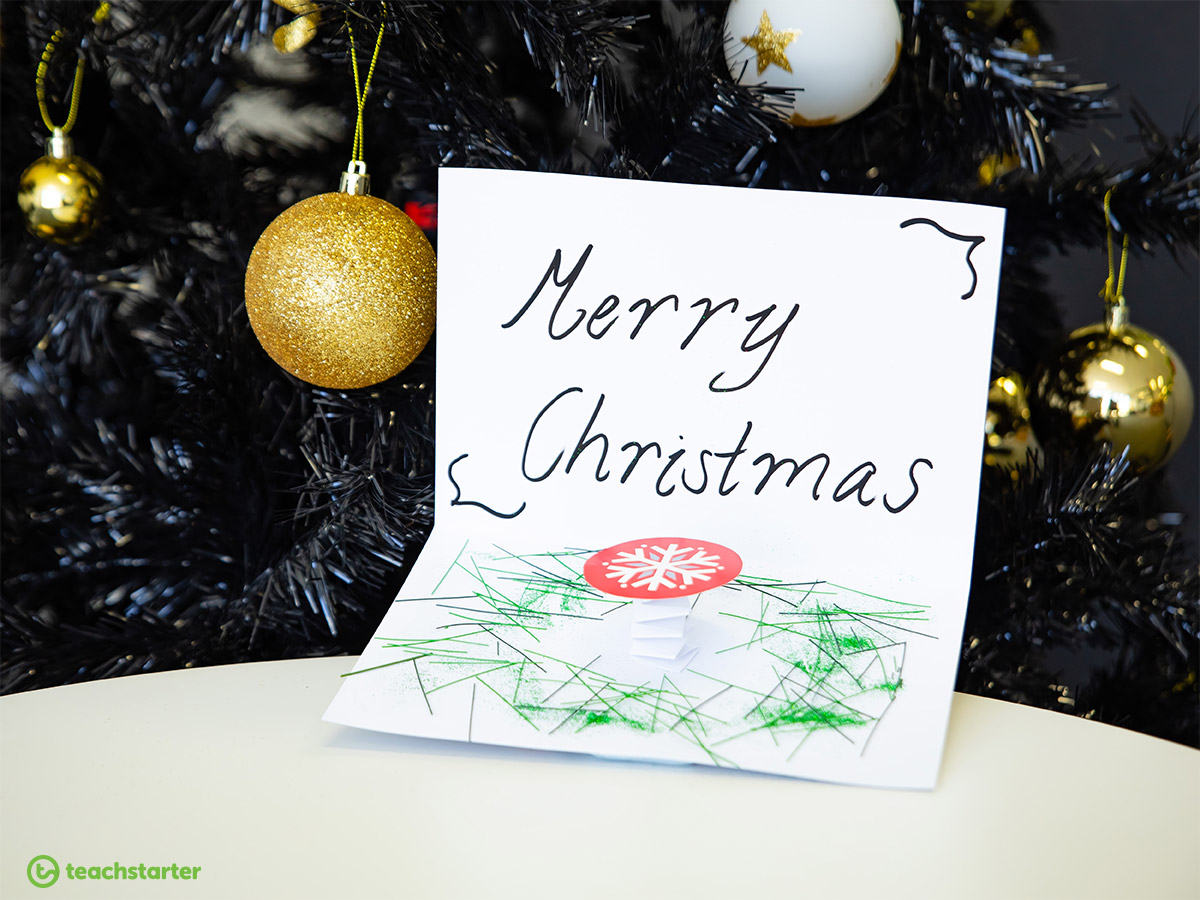
Materials:
- Christmas coloured A4 card
- used Christmas cards from previous years
- two strips of paper of equal size (the width and length depends on the size of your pop-up)
- scissors
- glue
To make your card:
- Choose a decal from a used Christmas card and cut around it.
- Fold your A4 piece of card in half to make a card.
- To make your paper spring, glue the ends of your two strips of paper together to make a right angle.
- With the corner on the upper side, fold the strip over to the left.
- Fold the bottom strip over and up.
- Continue until you only have one last fold to make, and glue it down.
- Glue your spring to the bottom of your Christmas card decal.
- Glue the other end of your spring to the inside of your Christmas card. Decorate around it as desired.
Your card recipients will be ‘bouncing’ with delight at this one!
Thumbprint Gifts
This card has a cute, personalised twist! Young students will love how effective this is without much effort, and older students will love the chance to get back to some good ol’ fingerpainting!
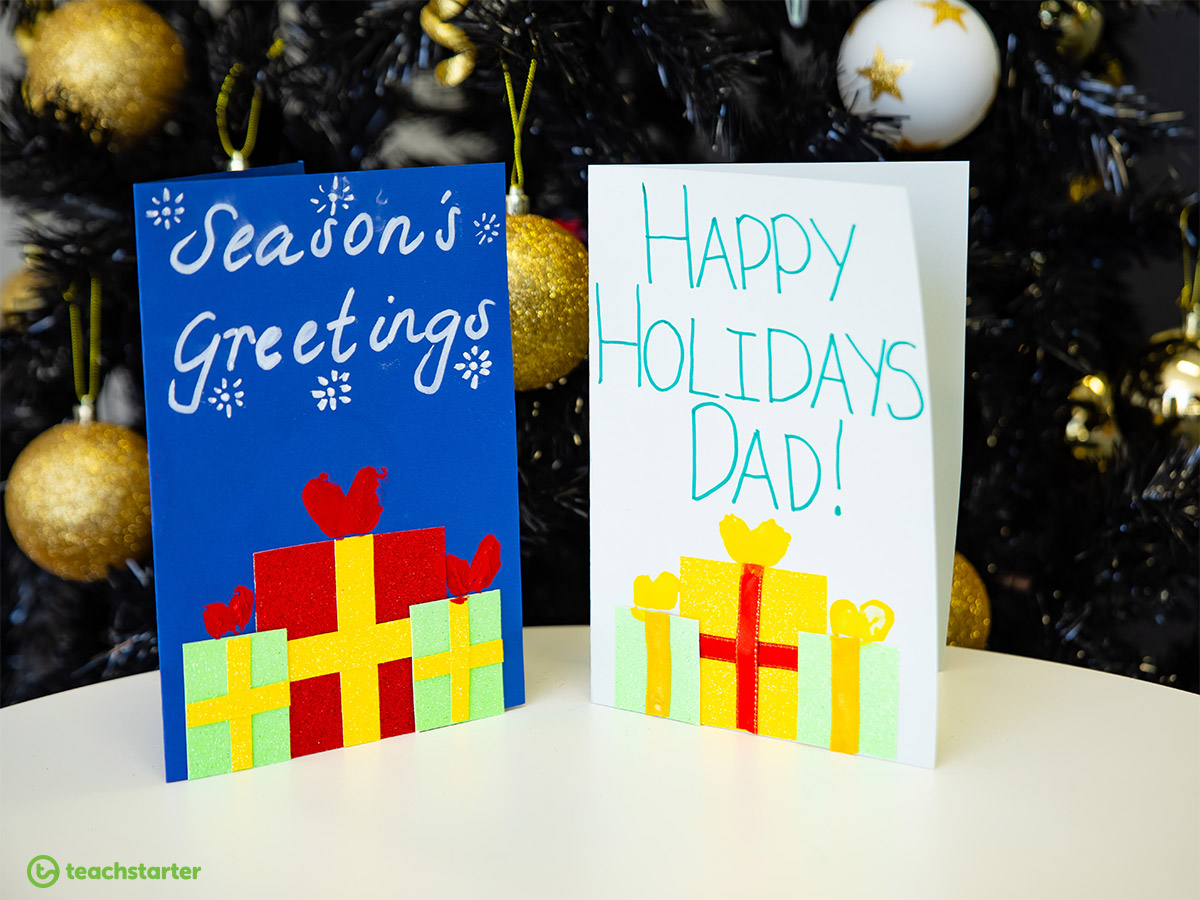
Materials:
- glittery paper/Christmas wrapping paper
- A4 card
- poster paint/finger paint/ink pads in Christmas colours
- thin ribbon
- glue/adhesive
To make your card:
- Using the glittery paper/Christmas wrapping paper, cut several square and rectangle shapes of assorted sizes.
- Stick these shapes on the front of your card to represent gifts.
- Cut the ribbon into short strips to fit the ‘gifts’.
- Using your thumb or finger and some paint, create a bow at the top of each gift.
- Decorate the rest of the card with a seasonal greeting of your choice.
Your students will love giving these more personalised cards to their friends and family.
Glittery and Bright Christmas Tree
Combine fine motor with Christmas card-making! Save time by pre-cutting your tree strips for your younger students.
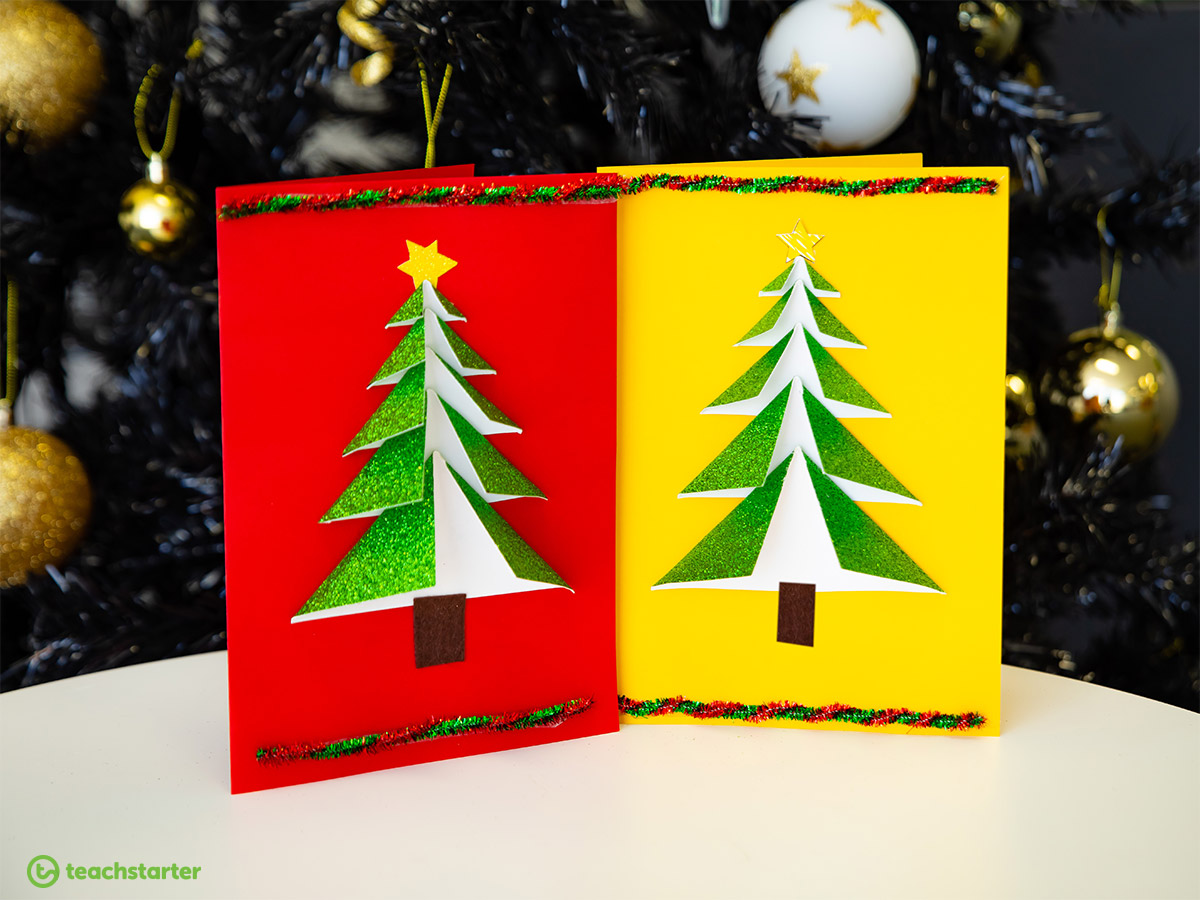
Materials:
- green glittery paper
- a yellow star to sit on top of the tree
- a brown piece of card for the trunk
- A4 card
- 4 x Christmas-coloured pipe cleaners
- thin ribbon
- glue/adhesive
To make your card:
- To make the strips for the tree, cut out strips so that the height of the strip is half of the width, getting larger as you go (our card uses 3cm x 1.5cm, 5cm x 2.5cm, 7cm x 3.5cm, 9cm x 4.5cm and 11cm x 5.5cm)
- Fold each strip so that the top outer corners meet in the middle at the bottom.
- Starting at the top, glue each tree triangle to your card so that the folds are facing up, slightly overlapping each piece as you go.
- Top your tree with the yellow star and paste your brown paper tree trunk at the bottom.
- Twist together the pipe cleaners and cut in half. Attach one strip to the top of the card and one to the bottom.
Voila! You have a beautiful, shiny Christmas tree card.






Comments