Are you scratching your head for Valentine’s Day craft ideas for your students this year? February is packed full of big days on the classroom calendar — from Black History Month to Presidents’ Day and everything in between — so how do you balance the fun of a heartfelt celebration with all that you still have to get done in February?
Get ready for the ultimate list of kid-appropriate classroom crafts for Valentine’s Day that’s been carefully created by our teacher team! Read on for science-based Valentine’s Day crafts, ideas that will bring in math and writing and so much more!
In putting this list together, we had a few criteria. We wanted to develop a list of crafts that:
- Wouldn’t make too much of a mess in the classroom
- Would apply to a variety of grade levels (you’ll find crafts for kindergarten, 1st grade, and even those upper elementary grades here)
- Won’t take too much time out of the school day
- Won’t cost you an arm and a leg in extra supplies
- Will give your students a taste of the joy of this sweet holiday
Nixed from the list were ideas that didn’t fit the criteria — which means you aren’t going to see those awfully cute hearts one of our teachers used to have her second graders sew because they proved to be too much work in the long run! As a bonus, we did add a few that have educational applications to the list too!
Short on time? Skip straight to Valentine’s Day printables.
Valentine’s Day Craft Ideas for the Classroom
Make Stained Glass Heart Window Decorations
Looking to decorate the classroom for Valentine’s Day and teach kids about the words translucent, transparent and opaque in one shot? Creating faux “stained glass” hearts combines a Valentine’s Day craft for the classroom with a hands-on lesson that shows how beams of light are impacted by different materials.
How to make faux stained glass hearts with your students:
- Print out our heart template (it’s free to download!), and trace it onto a piece of black cardstock.
- Draw a smaller heart inside, and cut out the inside heart to create a frame.
- Stick a piece of clear contact paper on one side of the heart so that the sticky side comes through the middle.
- Trim off any excess contact paper.
- Have your students stick small pieces of tissue paper all over the inside of their hearts, completely covering the sticky side.
- Once they’ve finished covering the contact paper, cover the tissue paper with another piece of contact paper.
- Trim off any excess.
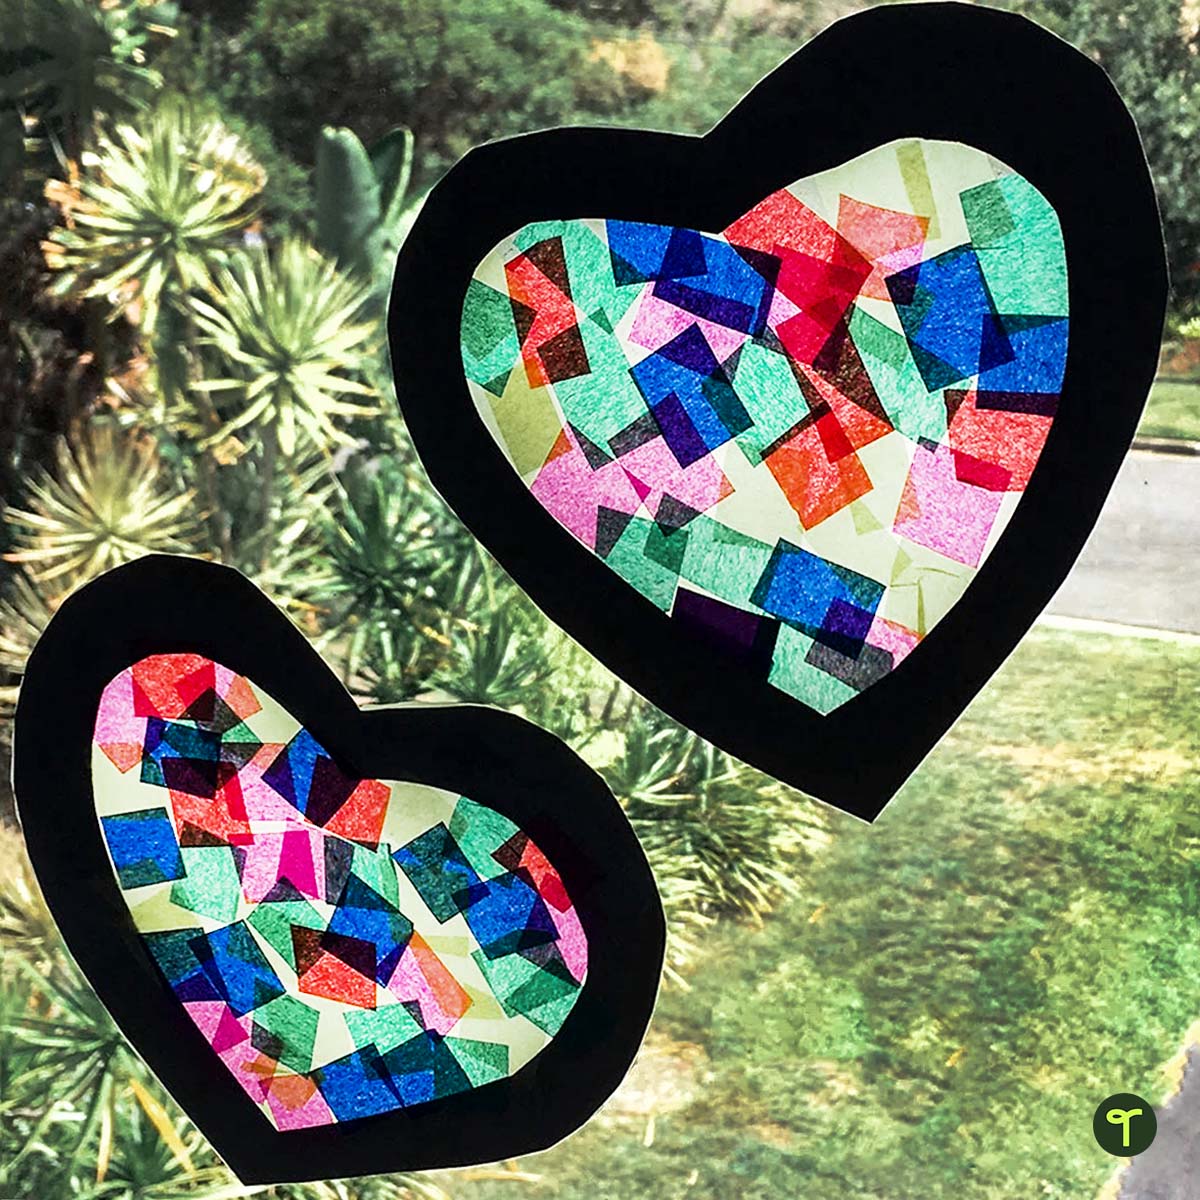
You can now hang your students’ hearts on the classroom window and make observations about how the different materials — the glass of the window, the dark cardstock, and the tissue paper — impact the light waves. Students can record what they see happening, what they think is happening, and what they’re wondering about on a see, think, wonder template as part of the lesson.
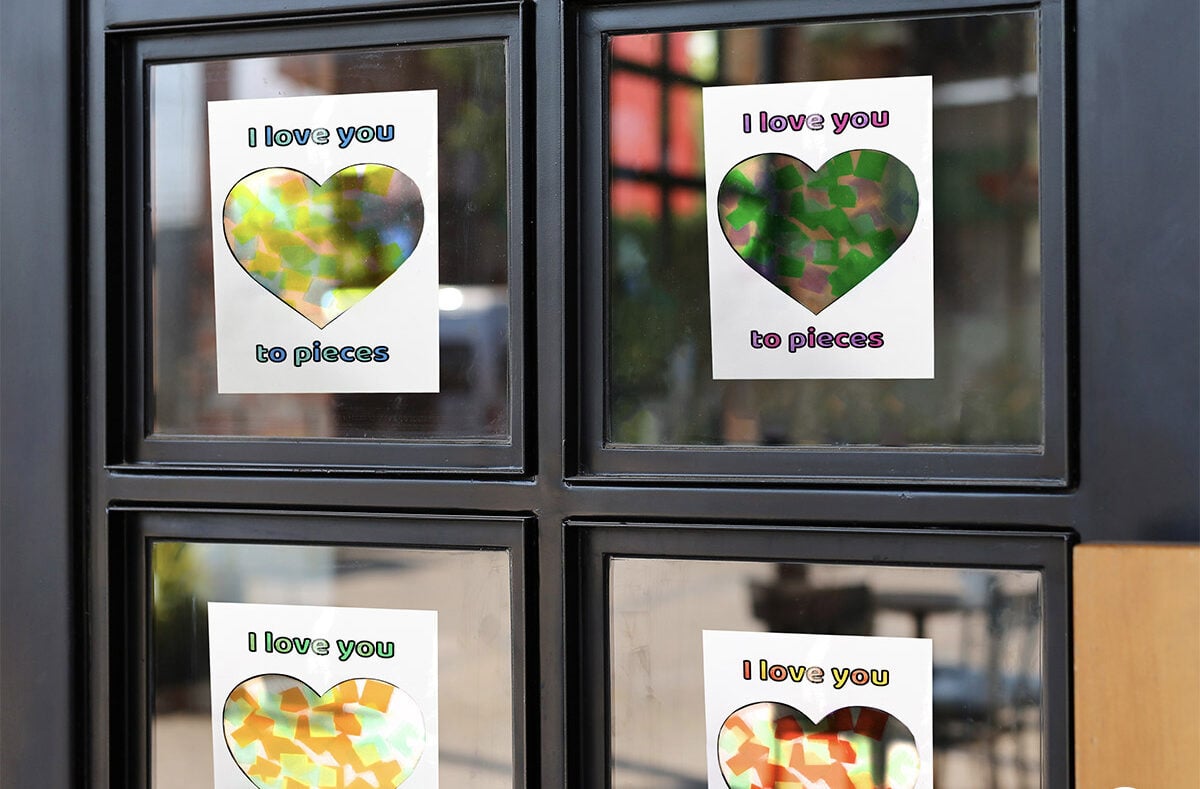
Looking for another way to create a stained glass effect for your classroom windows? You can also use the front page of our I Love You to Pieces Card to create colorful confetti hearts.
How to make these stained glass hearts:
- Print off the card template and cut out the center of the heart.
- Using clear contact paper, stick a piece on the backside of the heart so that the sticky side is in the middle of the heart on the front side.
- Students stick small pieces of tissue paper all over the inside.
- Stick the confetti hearts to your window for a beautiful stained glass effect.
Create Geometric Hearts in STEM
Bring the fun of the holiday into your STEM activities with a craft that tests students’ understanding of geometric shapes and engineering principles. The challenge for students is to design and construct a geometric heart using straws, pipe cleaners and other classroom supplies (e.g. tape, scissors, etc.)! The hearts should showcase symmetry and incorporate at least three different geometric shapes.
When students have completed their hearts, hang them around the classroom as Valentine’s Day decor.
Create a Happy Heart Classroom Window Display
The “love” focus of the holiday doesn’t have to be romantic. Valentine’s Day is an excellent opportunity to think about and celebrate what makes our hearts happy, such as hobbies, foods and places!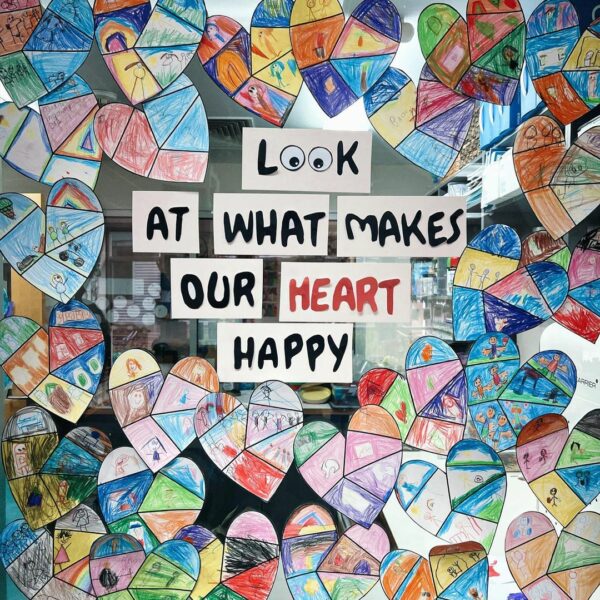
Teacher Miss D of @missdteaching_ created this beautiful gratitude display in her classroom for students to reflect on what makes them happy.
Build Heart Books
Another favorite Valentine’s Day craft idea for the classroom among members of our teacher team is this heart book. They’re a little more complicated to make than the stained glass hearts, but they’re a great lesson in symmetry for your 1st and 2nd graders, and they work for a number of grade levels.
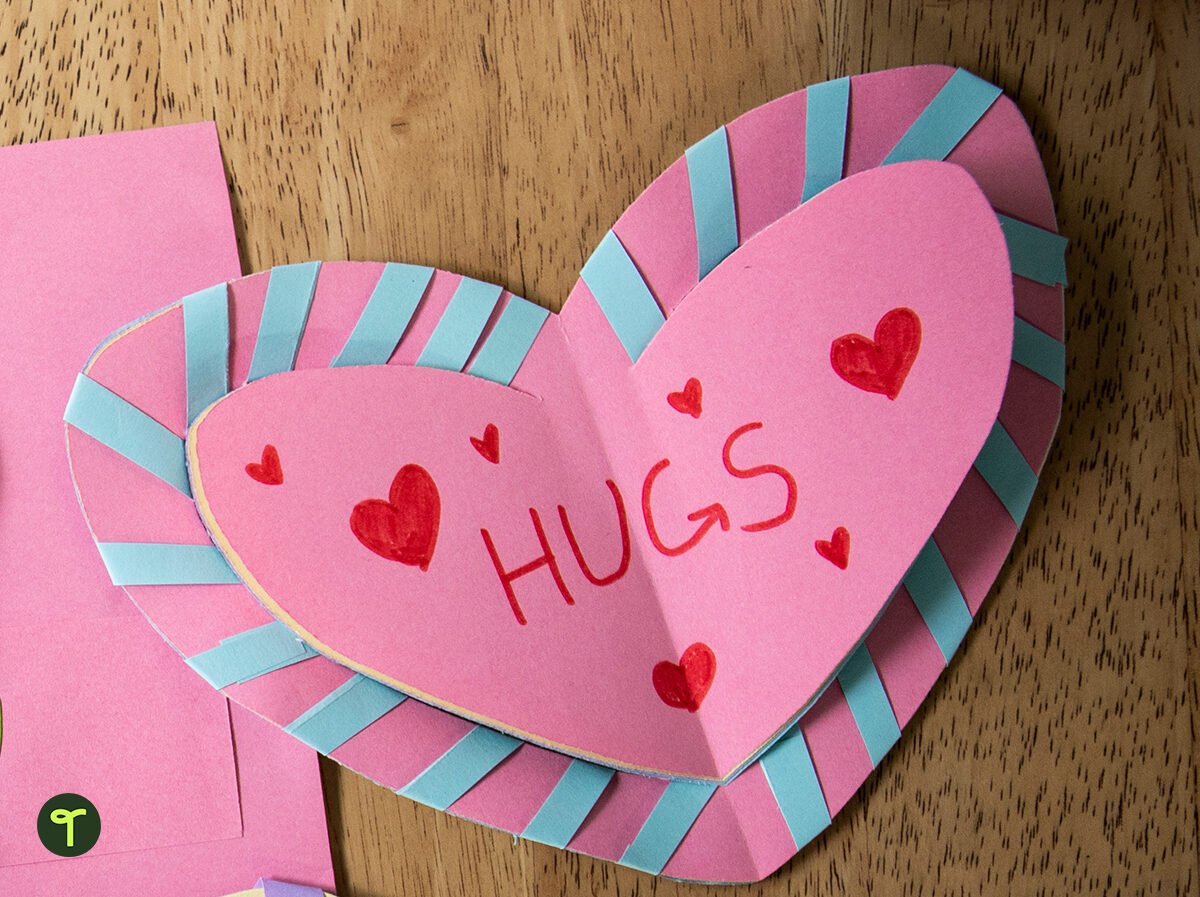
Once they’re done creating their heart books, turn it into a social-emotional learning opportunity. Students can pass them around the room, and their classmates can write one positive thing about them in the book. This helps avoid hurt feelings that can occur when students hand out Valentine’s Day cards to their peers and encourages empathy in your classroom.
Check out our video for the full details on how to make these heart books, including step-by-step instructions.
Make Rainbow Heart Artwork
If you’re looking for even simpler (yet just as beautiful!) Valentine’s art idea, teacher @ms.h.teach has given us more inspiration with a rainbow heart activity for art class.
To create this rainbow heart, you’ll need some oil pastels to draw the heart outlines and then paint over the top using watercolor paint, food dye or inks. Let the artwork dry and turn it into a card or Valentine’s bulletin board.
Create Beary-Cute Paper Chocolate Holders
Help your students create a sweet Valentine gift to take home to their loved ones!
In this example, students will create a little bear, but they can also choose whichever animal they like best. First, have your students draw out the shape of a bear’s body (facing forward complete with arms and legs). Then, have them cut out their bear and draw a little face.
To complete, have your students glue a small chocolate to the bear’s belly and fold in the arms to make it look the bear is holding their chocolate. Dove chocolates and Hershey’s Kisses work well for this craft since they have a flat edge.
Create an I Love You to Pieces Valentine’s Card
Here’s another fun Valentine’s Day card idea to make with your class! Creating “I Love to Pieces” Valentines is the perfect activity to add to a lesson on writing using figurative language, such as idioms.
Teacher Hayley Farrugia of @followingmissfarrugia swears by this activity, saying, ‘This resource is brilliant in its simplicity and versatility. It is perfect for any special occasion…’
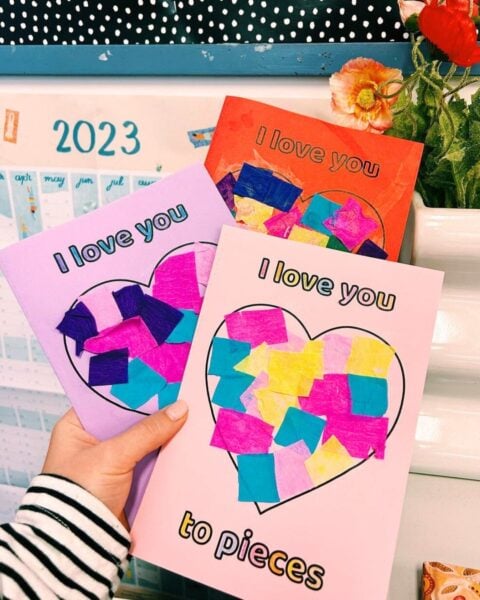
Here’s what you need to make it:
- I Love You to Pieces Valentine’s Day Card Template
- Tissue paper to stick inside the heart — cut up into squares, this becomes the pieces of the heart
- Glue
- Scissors
- Colored pencils or crayons
- Pencil
Incorporate this activity into your figurative writing lessons with a discussion of what makes I Love You to Pieces an idiom and how to use idioms in your writing.
Create an I Love You to Pieces Sustainability Craft
Looking for an alternate twist on the I Love You To Pieces idiom that brings your science or social studies standards into the project for the holiday?
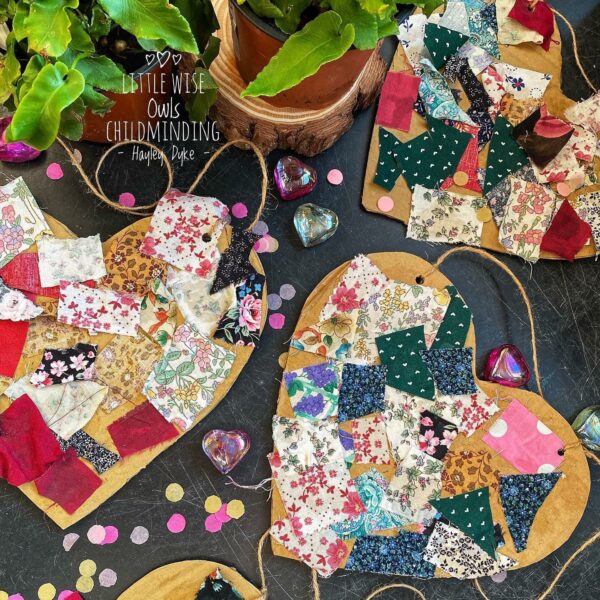
We love this craft by teacher Hayley Dyke, which takes the phrase “I love you to pieces” quite literally and focuses on sustainability by recycling little “pieces” of fabric, buttons and other assorted items into a Valentine’s Day gift students can take home to gift to a loved one.
Photo courtesy of teacher Hayley Dyke
Why not incorporate this into a lesson on sustainability? Introduce sustainability terms like reduce, reuse and recycle, as part of a lesson that explores the relationship between human populations and the physical world.
Lead a class brainstorm, challenging students to think of items in their everyday lives that they can reuse or recycle and how they can reuse them. This is a perfect segue into talking about reusing items as gifts and a good introduction to your Valentine’s craft activity.
You’ll need:
- Cardboard
- Hole Punch
- Free heart template
- Scissors
- Fabric scraps
- Old buttons or beads
- Twine
- Glue
You can ask students to bring assorted items from home — such as buttons off of old shirts, beads from broken bracelets, etc.
Once everything is assembled, students will need to trace their heart template on cardboard, and carefully cut out the shape.
Have each student glue their selected pieces of fabric, buttons, beads and more onto their cardboard heart and finish by tying a piece of twine through the holes at the top. Compiled all together, these can make a cute bulletin board display and/or gifts to take home for parents or guardians!
Need an extension activity? Incorporate your ELA standards by asking students to research and present one additional way to contribute to sustainability in their community.
Embroider a Heart
If you have older students and are looking for a unique Valentine’s activity for your classroom party, consider breaking out some embroidery supplies!
You’ll need:
- Plastic Needles
- Plastic or Bamboo Embroidery Hoops
- Cotton or Linen Fabric (cut into squares to fit inside the hoops)
- Yarn or Embroidery Floss
- Pen
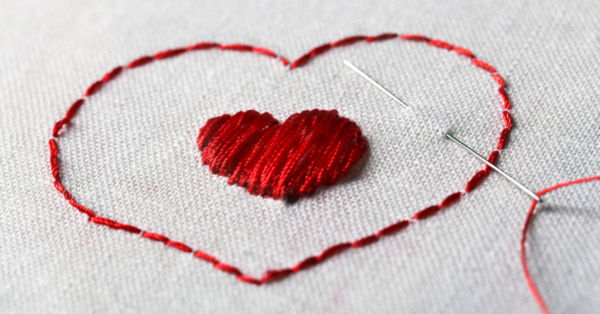
To create an embroidered heart, have your students:
- Separate the outer and inner embroidery hoops.
- Place the fabric square over the inner hoop and then place the outer hoop over the fabric.
- Tighten the screw at the top of the hoop and gently pull the fabric until it’s taut like a drum inside the two hoops.
- Lightly draw a heart outline anywhere on the fabric.
- Thread the needle with the yarn or embroidery floss.
- Tie a knot at the other end of the floss once it’s threaded.
- Poke the needle up through the backside of the hoop along the line of the heart.
- Go back down about half an inch further out from the previous stitch.
- Finish the line using this “up and down” method, creating a back stitch.
- When finished creating a heart, tie the floss at the back and remove the needle.
- The remaining edges of the fabric can be trimmed down, glued down or threaded together so they don’t appear from the front.
Watch this back stitch video tutorial while completing this project for further assistance!
Create Dino-Mite Cards
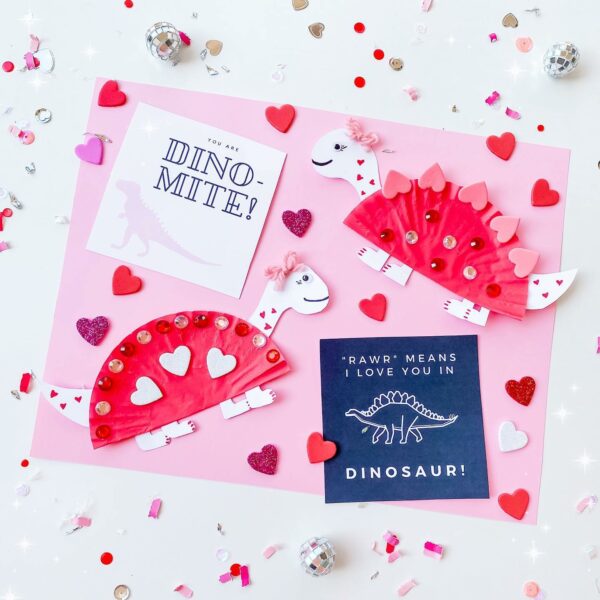 Photo courtesy of former high school teacher Kelsey Easterling of Texas
The dollar stores are full of red and pink cupcake liners this time of year, so put them to use in the classroom to create dino-inspired Valentine’s crafts like teacher Kelsey Easterling of Texas?
In addition to cupcake liners, you’ll need glue, paper, small foam hearts, fake gemstones and…dare we say glitter? Whatever you compile for craft supplies, your students are sure to make some precious prehistoric creations.
Make Valentine’s Day Cardholder Bags
Keep the classroom neat and tidy with their own Valentine’s Day bags to collect and then carry home their loot.
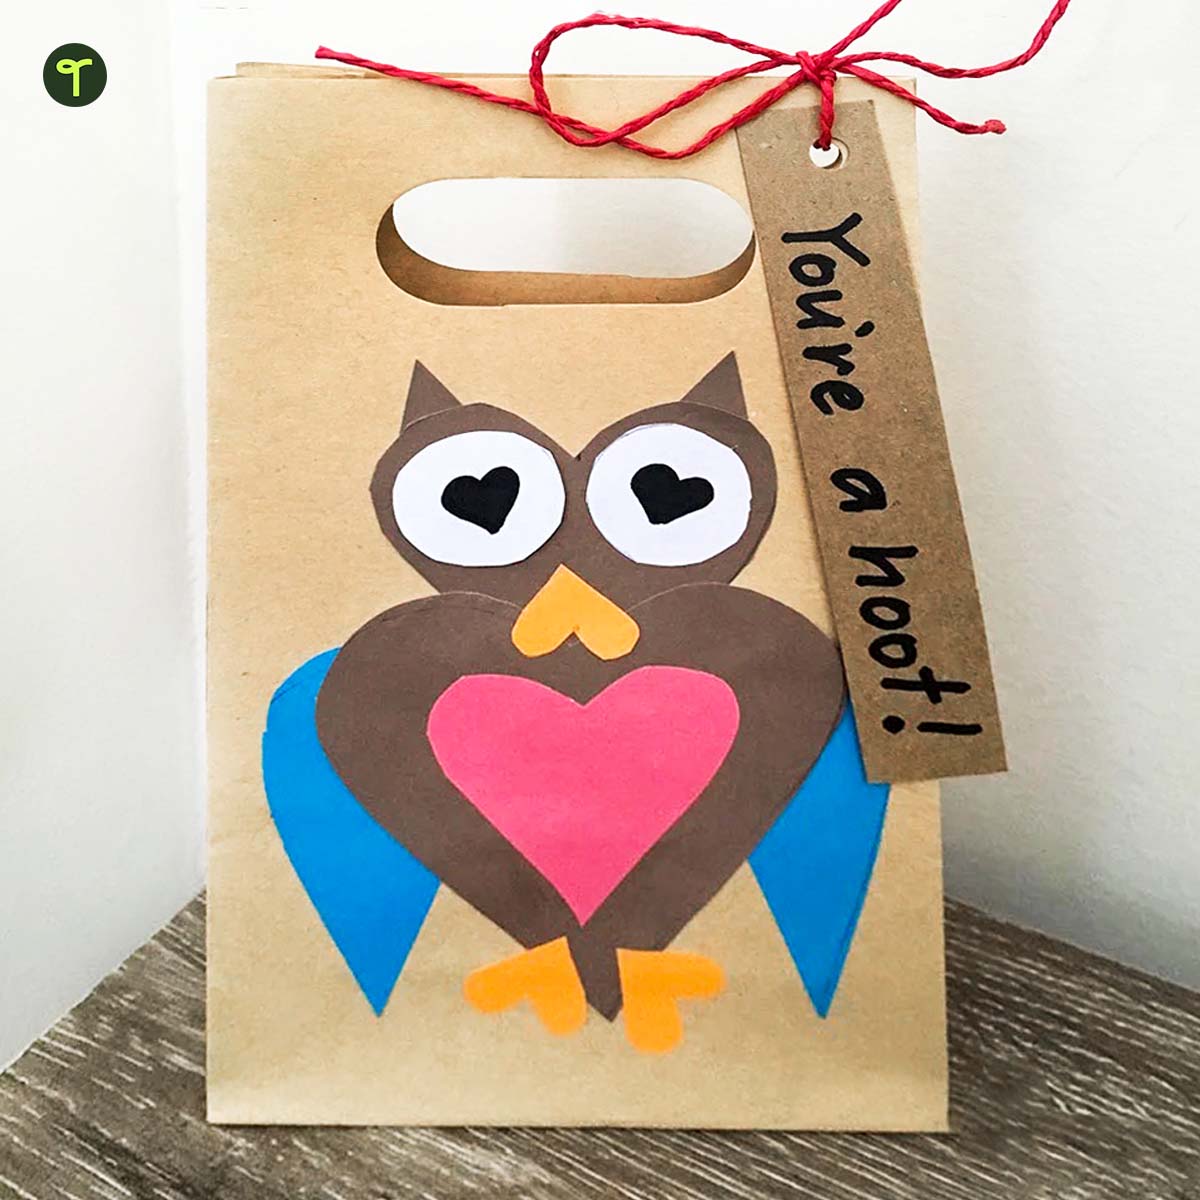
Students can make a favorite animal using construction paper and other craft supplies (like the owl below), then paste it to the front of a large paper bag. The bag can be left on the student’s desk, and when students arrive in the classroom on Valentine’s Day, they can walk around from desk to desk, delivering cards into the waiting cardholders.
Don’t have time for students to start designing their own animals from scratch? Try these printable bee and fox bag templates for personalizing their cardholder bags.

Decorate a Handprint Tree
Photo courtesy of creative mom Busy Little Bees of California
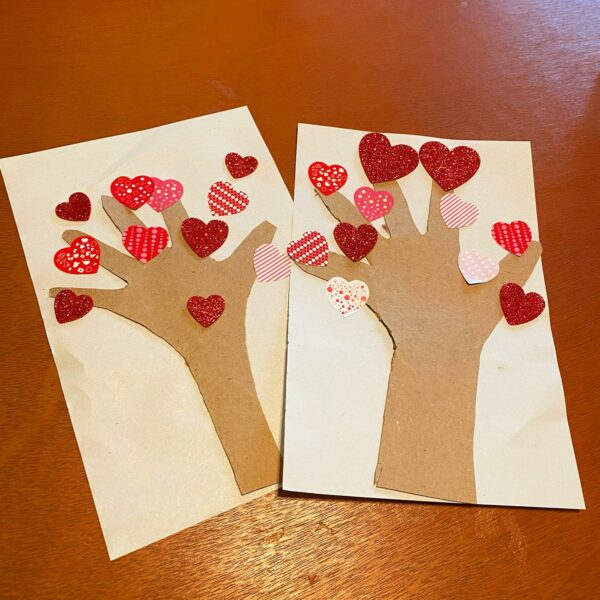
Treasure those little hands with some tiny hearts for Valentine’s Day! Busy Little Bees of San Francisco designed this craft with her kids, and it makes a perfect Valentine’s card for pre-K or kindergarten students to bring home to their guardians and loved ones.
You’ll need:
- Scissors
- Pencil
- Glue
- Stickers
- Paper
- Card
To create:
- Have each student trace their hand with a pencil, including some of their arm as the trunk of the tree. If your students are too little, you may want to trace each hand yourself or seek the assistance of a parent volunteer or assistant.
- Next, have each student cut out their hand tree. Use a volunteer if students are too little.
- Glue the hand tree onto a piece of paper.
- Students can use heart stickers or cut out their own little hearts with colored paper to personalize their tree!
Practice Fine Motor Skills With Heart Threading
Develop fine motor skills while creating a gift for your students to bring home to a loved one.
Print the free Heart Template on cardstock, cut it out, and punch holes around the edge of the heart. Using a piece of yarn, have students thread in and out of each hole around the heart. Make sure you tape the end of the yarn to the back of the heart before the student begins threading, and tape the end to the back when they have finished the last hole.
Once they have finished threading the yarn, have them ball up pieces of red tissue paper to fill the middle of the heart. Not only does it make the heart a bit more festive, but it is an easy way to build the muscles in your students’ fingers!
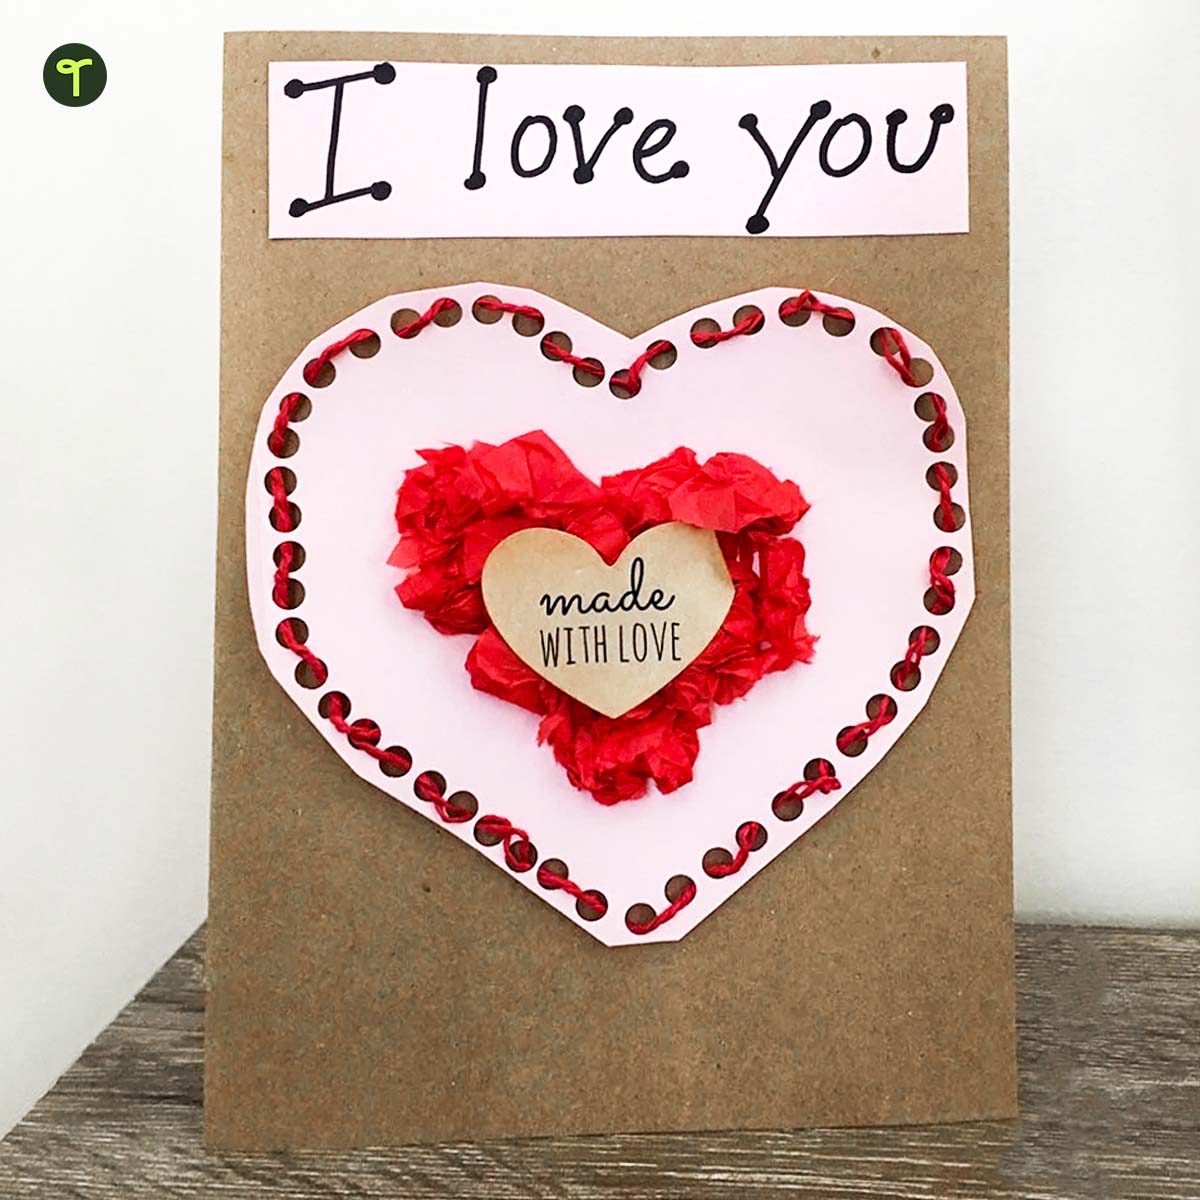
You can leave it at that, or you can turn it into a Valentine’s Day card like we did below by mounting the threaded heart on cardstock and adding an “I love you” message.
Draw a Photo Frame
Using a disposable camera (or photos you may already have of each of your students), print photos so each child can create their own photo frame to take home this holiday.
Have your students glue their photo onto a blank sheet of paper in any orientation they choose. Then, have them draw and color a frame around the photo or they can glue lightweight objects such as foam hearts, glitter, pompoms, etc. These will make wonderful photo memories for loved ones at home and even a cute classroom display during the month of February!





Comments